
Talk Log Display Settings
2024/03/07
This chapter describes how to set up the Talk Log for use.
These settings are not required.
Please configure the settings if necessary according to your usage environment.
Goal: Check the contents of the talk stored in the Talk Log.
Behavior when related listings are placed in a page layout


Fields & Relationships
Goal: Create field to be displayed in the related list of linked objects.
* If the linked object is "Lead", "Account (individual Account)", or "Contact", skip this setting.
* For details on the linked object, see Integration Target Object Settings: LINE WORKS Integration Settings
1. Click the gear icon at the top right of the screen - [Setup] - [Object Manager].
* Alternatively, search for “Object Manager" with a quick search
2. In “Object Manager” , click the “Talk Log”
3. In “Fields & Relationships”, click the “New” button
4. Select "Lookup Relationship" in "Data Type" and click the "Next" button.
5. Select the object to be linked in "Related To" and click the "Next" button.
6. Enter the following information in the "Enter Details" field and click the "Next" button.
[Field Label] – [optional]
[Field Name] – [optional]
[Child Relationship Name] – [optional]
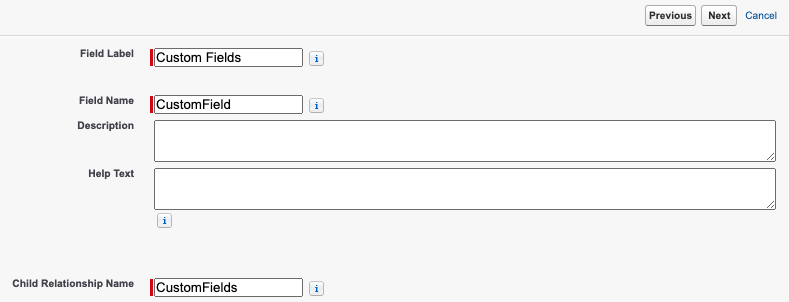
* The attached image is an example of setting arbitrary items.
7. In the profile(*) to be used in "Item Level Security Settings," check the "Referable" checkbox and click the "Next" button.
* The profile must be applied to the profile of the user who authenticated on the LINE WORKS linked
authentication screen.
8. Select "Talk Log Layout" as the page layout for displaying the items in the "Add reference field to Page Layouts
" section, and click the [Next] button.
9. In the "Add custom related lists" section, select the name of the page layout you wish to display as a related list
and click the [Save] button.
Flows
Goal: Create a flow to store values in the custom items created in the previous section.
* If you have not done "Fields & Relationships", skip this step.
1. Click the gear icon at the top right of the screen - [Setup] - [Flows].
* Alternatively, search for “Object Manager" with a quick search
2. Click "New Flow" button
3. Select "Record-Triggered Flow" in "New Flow" and click "Create" button.
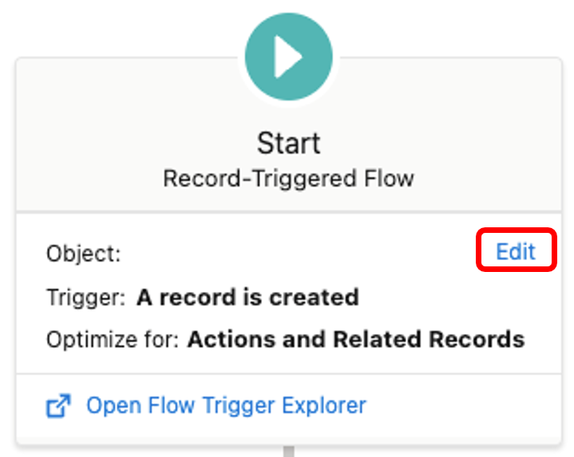
4. A new window "Configure Start" will be launched,
If the window is closed, you can open it by clicking the "Edit" link.
5. Select and enter the following
[Object] – [Talk Log]
[Trigger the Flow When :] – [A record is created or updated]
[Condition Requirements] – [All Conditions Are Met (AND)]
[Field] – [palw__RecordId__c]
[Operator] – [Starts With]
[Value] – [First 3 digits of prefix of linked object record (*)]
●How to find out the prefix
The entity type of all Salesforce record IDs is encoded in the first 3 characters
https://help.salesforce.com/s/articleView?id=000385203&type=1

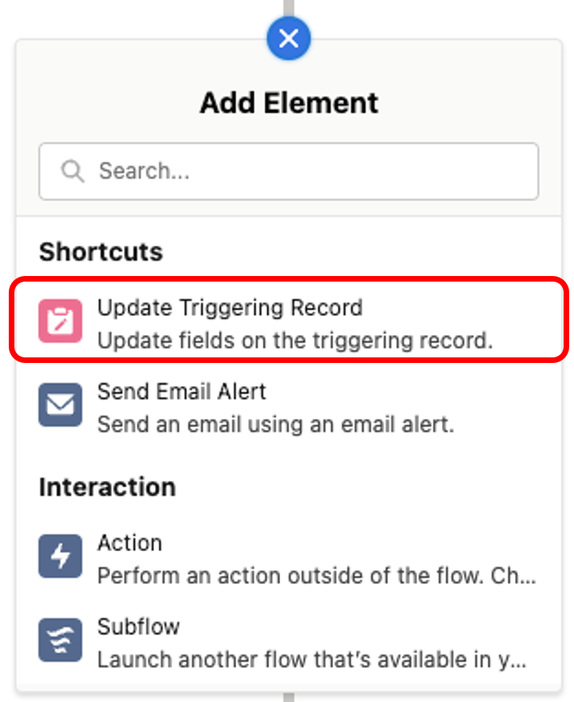
6. Click Add Element (+)
7. Click on "Update Triggering Record"
8. Select and enter the following information in "New Update Records"
[Label] – [Update]
[API Name] – [Update]
[Field] – [Reference relationship items created with Fields & Relationships]
[Value] – [$Record > Record ID]

9. Click "Save" button (the following is optional)
[Flow Label] – [Talk Log Update]
[Flow API Name] – [Talk_Log_Update]
10. Click "Activate" button
Page Layout
Goal: Be able to check the Talk Log.
1. Click the gear icon at the top right of the screen - [Setup] - [Flows].
* Alternatively, search for “Object Manager" with a quick search
2. From the list of custom objects, click on the object to be linked
3. "Page Layout," click the page layout you wish to view.
4. On the Edit page, select the Related List, and drag & drop "LINE WORKS" from the list at the top of the screen to add it to the Related List.

5. Click Related List Properties

6. Select the following in "Related List Properties" and click the "OK" button.
* Can be a separate item for recommended items.
[Selected Fields] – [Talk Log]
[Selected Fields] – [Start Date]
[Selected Fields] – [End Date]
[Selected Fields] – [Owner Alias]

7. Click "Save".
この記事は役に立ちましたか?
0人が役立ったと言っています
ご協力ありがとうございます。